This is the second in a series of posts, which develop a module to add a despatch date field to Magento Admin. Part 1 provided some background and set up the basic module. At this stage the module does nothing. In this long post we start to remedy that and take a look at layout. Layout is a good place to start, viewable, tangible, and intuitive (we hope).
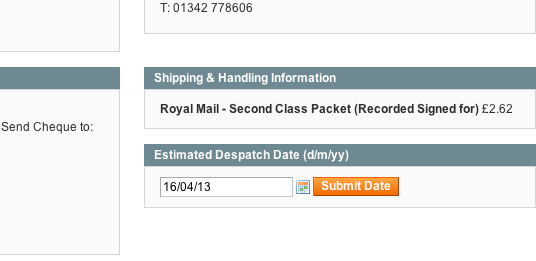
We’d like the field displayed in the Order View screen immediately below Shipping & Handling Information. Here’s the image again.
This isn’t like building a page from scratch. The page for our field already exists. We’re just using some of its real estate. Along the way though, we’ll identify how this page came into existence.
If you just want to build the Despatch Date module, you can jump to the heading below ‘Configuring the Layout for Despatch Date’ and skip these headings:
‘Revealing our templates’ – looks at template hints
‘Understanding nesting and layout’ – looks at an example of getChildHtml()
‘The block class’ – carrying on with the example, looks at block type
‘Controller – a quick look’ – as the name suggests, looks at the role of controllers in rendering the page
Revealing our templates
So how do we find out which bit of real estate this view belongs to. If we were developing for the front end of our site, within Magento Admin we could enable our pages annotated with their template names – with System : Configuration : Advanced : Developer : Debug and set template path hints to Yes. This would allow us to see which parts of the page belonged to which template files. However, life in Admin is not quite that simple. As we are developing for Admin, we’ll need to access the table core_config_data in our database and add a new row with
INSERT INTO `core_config_data` (`config_id`, `scope`, `scope_id`, `path`, `value`) VALUES (NULL, ‘websites’, ‘0’, ‘dev/debug/template_hints’, ‘1’);.
We can do this within phpMyAdmin by typing the SQL or using the phpMyAdmin insert option. The value of the `value` field is 1 with template hints turned on, so we can set this to 0 later to turn them off again. Its worth noting that we can also insert a row to display block names on our page. We’ll look at blocks in more depth later in this post. To add block names, our row would take these values: NULL, ‘websites’, ‘0’, ‘dev/debug/template_hints_blocks’, 1.
With template hints turned on, we can see that the location we want for the new Estimated Despatch Date field (marked with X in the image) is contained within app/design/adminhtml/default/default/template/sales/order/view/tab/info.phtml.
Understanding nesting and layout
Template files are nested one inside the other. The method getChildHtml() is used to include the template we want inside a container template. Strictly speaking, we are including blocks inside blocks. The method getChildHtml() includes a block inside a containing block, and each block is linked to a template file which displays our page. Each template file needs to be associated with a block class containing any methods called within the template file (including the method getChildHtml() itself by the way). In a later post we’ll create a block class (Blessthemoon_Despatchdate_Block_Fields) which will contain a method which we’ll call from within the fields.phtml file – the template file that we are going to create in this post. As another aside (there are lots of them!), blocks are loaded and rendered by methods in controller classes. In a later post we’ll create one of those too.
As an example of nesting, we can see in the diagram that adminhtml/default/default/template/sales/order/view/tab/info.phtml also contains adminhtml/default/default/template/sales/order/view/info.phtml. Its the template with sections for order number, account information, billing address and shipping address. If we look in adminhtml/default/default/template/sales/order/view/tab/info.phtml at or around line 32, we find this code:
28<div>
29<div id=”order-messages”>
30<?php echo $this->getChildHtml(‘order_messages’) ?>
31</div>
32<?php echo $this->getChildHtml(‘order_info’) ?>
33<input type=”hidden” name=”order_id” value=”<?php echo $_order->getId() ?>”/>
34<?php if ($_order->getIsVirtual()): ?>
35<div class=”box-right”>
<?php echo $this->getChildHtml(‘order_info’) ?> contains the reference to a block named “order-info”. Blocks are defined in xml layout files. Layout files define blocks, their location in our site, the class they belong to and the name of the template file associated with them. For our example, if we look in the layout file app/design/adminhtml/default/default/layout/sales.xml from around line 75 onwards, we’ll find this code:
75<adminhtml_sales_order_view>
76<reference name=”head”>
77<action method=”addJs”><file>mage/adminhtml/giftmessage.js</file></action>
78<action method=”addJs”><file>mage/adminhtml/giftoptions/tooltip.js</file></action>
79</reference>
80<reference name=”content”>
81<block type=”adminhtml/sales_order_view” name=”sales_order_edit”></block>
82</reference>
83<reference name=”left”>
84<block type=”adminhtml/sales_order_view_tabs” name=”sales_order_tabs”>
85<block type=”adminhtml/sales_order_view_tab_info” name=”order_tab_info” template=”sales/order/view/tab/info.phtml”>
86<block type=”adminhtml/sales_order_view_messages” name=”order_messages”></block>
87<block type=”adminhtml/sales_order_view_info” name=”order_info” template=”sales/order/view/info.phtml”></block>
88<block type=”adminhtml/sales_order_view_items” name=”order_items” template=”sales/order/view/items.phtml”>
Line 87 highlighted in red is the block definition to which getChildHtml(‘order_info’) in our template refers. Its name is ‘order_info’ (as specified by ‘name’). The ‘template’ is specified as ‘sales/order/view/info.phtml’. So we see how the getChildHtml(‘order_info’) brings the nested template adminhtml/default/default/template/sales/order/view/info.phtml into our order view page. See how the blocks are nested in this xml code. This block named ‘order_info’ is nested within the block named ‘order_tab-info’ and you won’t find the closing </block> tag for ‘order_tab-info’ until around line 127 in sales.xml – ‘order_tab-info’ nests a lot of blocks on this page! It’s associated template as you can see is ‘sales/order/view/tab/info.phtml’. No surprise there, as that’s the template that we’ve already said nests ‘sales/order/view/info.phtml’. Also note how ‘order_tab-info’ is nested itself within ‘sales_order_tabs’ defined on line 84.
Note <reference name=left> on line 83. All xml nested within this reference (the tag isn’t closed until around line 135) relate to the block named ‘left’. The ‘reference’ tag means they are updates to this block. All blocks named within reference are nested within the ‘left’ block – i.e. children of ‘left’.
In case you are wondering where the block ‘left’ is defined, you’ll find it in app/design/adminhtml/default/default/layout/main.xml. And adminhtml/default/default/template/page.phtml is the top level template for the order view page and includes <?php echo $this->getChildHtml(‘left’) ?>. The top-level block is named ‘root’ as are all top level blocks on a page.
The block class
In addition to its ‘name’ and ‘template’, the ‘order_info’ block also has a ‘type’. The type in this case is ‘adminhtml/sales_order_view_info’. This is interpreted by Magento as the class ‘Mage_Adminhtml_Block_Sales_Order_View_Info’.
The class is defined in the block file app/code/core/Mage/Adminhtml/Block/Sales/Order/View/Info.php. The directory Mage/Adminhtml is the directory under the core code directory app/code/core where ‘Mage’ is the namespace and ‘Adminhtml’ is the module – like the namespace (Blessthemoon) and the module name (Despatchdate) directory structure we built under app/code/local in post 1 of this series.
With the class ‘Mage_Adminhtml_Block_Sales_Order_View_Info’ defined in Info.php, we can call methods in it from within the block’s template info.phtml. We can also call methods in any class that ‘Mage_Adminhtml_Block_Sales_Order_View_Info’ extends. For example, within the template info.phtml we find this bit of code: <?php $_incl = $this->displayShippingPriceInclTax($_order); ?>. The ‘$this’ refers to the block object which has been instantiated, and the method ‘displayShippingPriceInclTax($_order)’ can be found in the class Mage_Adminhtml_Block_Sales_Order_Abstract in Mage/Adminhtml/Block/Sales/Order/Abstract.php, which is the class that ‘Mage_Adminhtml_Block_Sales_Order_View_Info’ extends.
Controllers – a quick look
Look at line 75 before we move on. You can see <adminhtml_sales_order_view>. This handle tells us that this layout code applies just to the Order View page. It also tells us the controller class and method that will render the Order View page. Pay attention to how ‘adminhtml_sales_order_view’ is mapped to our directory structure. Again, the directory ‘Mage/Adminhtml’ is the directory under our core code directory app/code/core. If we look in the controllers directory under Adminhtml, we find Sales/OrderController.php. This file contains the class Mage_Adminhtml_Sales_OrderController and within this class we find the method viewAction (‘view’ being the last part of our ‘adminhtml_sales_order_view’), and it’s this method that is responsible for rendering our Order View page.
The url that we’ll use to call this method and display the order with say an ID of 475 will be: – http://www.oursite.com/index.php/admin/sales_order/view/order_id/475/ where the order_id is used by the viewAction method to display the correct order. You can see how the url also maps nicely to the directory structure, controller and action. When the url is entered and the action method is called, then the blocks within <adminhtml_sales_order_view> are instantiated, loaded and rendered. Alan Storm in part 4 of his excellent ‘Magento for Developers’ series gives more detail as to how this process works.
I’ll be covering controllers in more depth in a later post when we add a controller for our Despatch Date field.
Configuring the layout for Despatch Date
OK, with that exploration of layout behind us and a quick look at controllers as an aside, let’s get serious about displaying our new field, ‘Despatch Date’.
Some readers will have created new templates for Magento’s frontend. There’s a logical hierarchical approach to adding a new template in frontend. Any template files (.phtml) located in a mirrored directory path in the theme directory override template files in the base directory. So to make changes for example to 1column.phtml, copy from app/design/frontend/base/default/template/page/1column.phtml to app/design/frontend/default/yourtheme/template/page/1column.phtml and make changes there. This leaves native Magento files intact. The same applies to layout (xml) files copied to your theme’s folder. They override layout folders in the base layout folder. However, in most cases the simplest way to update frontend layout is with the file local.xml stored in the theme’s layout folder. Magento loads local.xml last overriding and updating other xml and uses local.xml markup (including the reference tag we’ve mentioned here) to make changes to layout. The beauty of this approach is that no modifications to other layout files are needed.
However, that approach won’t work in Admin! Here we have one directory path and no sense of a theme in which we can store layout that overrides Magento base layout files. Also, there’s no concept of auto-loading a local.xml file. That means we’ll need to specify the location of our layout xml file(s) using config.xml in our module. Here’s a diagram showing where we are headed. It shows the directory structure used in Admin. We’ll add the directories shown in orange and the files shown in red.
Here’s the diagram of our module we saw in part 1 of this series. We need to update config.xml (in red) to tell Magento where our layout file despatchdate.xml is located. We’ll also need to add Fields.php (in red). We’ll see why in just a moment.
Here’s the code in our config.xml file, with the code we need to add shown in red.
1<?xml version=”1.0″?>
2<config>
3<modules>
4<Blessthemoon_Despatchdate>
5<version>0.1.0</version>
6</Blessthemoon_Despatchdate>
7</modules>
8<adminhtml>
9<layout>
10<updates>
11<despatchdate>
12<file>despatchdate.xml</file>
13</despatchdate>
14</updates>
15</layout>
16</adminhtml>
17<global>
18<blocks>
19<despatchdate>
20<class>Blessthemoon_Despatchdate_Block</class>
21</despatchdate>
22</blocks>
23</global>
24</config>
Between the <adminhtml><layout></layout></adminhtml> tags we’ve defined the location of our layout file depatchdate.xml, and between the <global><blocks></blocks></global> tags we’ve identified where block classes for this module can be found, including the block class Blessthemoon_Despatchdate_Block_Fields which we’ll need for our new Despatch Date field.
Coding the layout xml
Now we’ll code despatchdate.xml as shown in the following:
1<?xml version=”1.0″?>
2<layout>
3<adminhtml_sales_order_view>
4<reference name=”order_tab_info”>
5<action method=”setTemplate”>
6<template>despatchdate/sales/order/view/tab/info.phtml</template>
7</action>
8<block type=”despatchdate/fields” name=”despatchdate” template=”despatchdate/fields.phtml” />
9</reference>
10</adminhtml_sales_order_view>
11</layout>
We’ve already seen some of these tags in this post. Here with <adminhtml_sales_order_view> we’re updating the order view page. We saw earlier that “order_tab_info” is the name of the containing block of the new block we need for Despatch Date – the big red ‘X’ in the image above is shown within that block. So we use <reference> to reference the block and <actionmethod=”setTemplate”> to set a new template file for the block. We’ll create this new template info.phtml in a moment in the file path specified within <template></template> and thus the original template will be overwritten.
We also need our new block for Despatch Date as a child block of “order_tab_info”. We’ve used the block tag in line 8 nested within <reference> and given our new block the name of “despatchdate” with the name and location of the template specified. We’ll need to code this file fields.phtml as well.
The block class is specified as “despatchdate/fields” which translates to a class of Blessthemoon_Despatchdate_Block_Fields which Magento will find because of the way we’ve now set up config.xml. Remember that methods we use in fields.phtml must be found within this class or its parent class. We’ll also need to setup the file Fields.php which holds the new class.
Coding the container template
OK, next step, let’s copy info.phtml from app/design/adminhtml/default/default/template/sales/order/view/tab/info.phtml to app/design/adminhtml/default/default/template/despatchdate/sales/order/view/tab/info.phtml. Find this section of code:
51<div class=”box-right”>
52<!–Shipping Method–>
53<div class=”entry-edit”>
54<div class=”entry-edit-head”>
55<h4 class=”icon-head head-shipping-method”><?php echo Mage::helper(‘sales’)->__(‘Shipping & Handling Information’) ?></h4>
56</div>
57<fieldset>
58<?php if ($_order->getTracksCollection()->count()) : ?>
59<a href=”#” id=”linkId” onclick=”popWin(‘<?php echo $this->helper(‘shipping’)->getTrackingPopupUrlBySalesModel($_order) ?>’,’trackorder’,’width=800,height=600,resizable=yes,scrollbars=yes’)” title=”<?php echo $this->__(‘Track Order’) ?>”><?php echo $this->__(‘Track Order’) ?></a>
60<br/>
61<?php endif; ?>
62<?php if ($_order->getShippingDescription()): ?>
63<strong><?php echo $_order->getShippingDescription() ?></strong>
65<?php if ($this->helper(‘tax’)->displayShippingPriceIncludingTax()): ?>
66<?php $_excl = $this->displayShippingPriceInclTax($_order); ?>
67<?php else: ?>
68<?php $_excl = $this->displayPriceAttribute(‘shipping_amount’, false, ‘ ‘); ?>
69<?php endif; ?>
70<?php $_incl = $this->displayShippingPriceInclTax($_order); ?>
72<?php echo $_excl; ?>
73<?php if ($this->helper(‘tax’)->displayShippingBothPrices() && $_incl != $_excl): ?>
74<?php echo $this->__(‘Incl. Tax’); ?> <?php echo $_incl; ?>)
75<?php endif; ?>
76<?php else: ?>
77<?php echo $this->helper(‘sales’)->__(‘No shipping information available’); ?>
78<?php endif; ?>
79</fieldset>
80</div>
81<?php echo $this->getChildHtml(‘despatchdate’); ?>
We need to add line 81 shown in red. The getChildHtml call brings in the block ‘despatchdate’ which we’ve just named in despatchdate.xml with its template, fields.phtml. Note the position of this statement immediately after the div class “entry-edit” for “Shipping Method”. Take another look at the image of the Order View page above if you want to refresh your memory on the position for the despatch date field that we’re aiming for.
Building the form
With the changes to info.phtml behind us, we now need fields.phtml. Here’s the code:
1<div>
2<div>
3<h4><?php echo $this->__(‘Estimated Despatch Date (d/m/yy)’) ?></h4>
4</div>
5<div class=”fieldset”>
6<form id=”dateform” action=”<?php echo $this->getUrl(‘despatchdate/form/post’)?>” method=”POST”>
7<input type=”hidden” name=”form_key” value=”<?php echo $this->getFormKey(); ?>” />
8<input type=”text” id=”estDestDate” name=”estDate” />
9<input type=”submit” id=”submit” name=”submit” value=”Submit Date”/>
10</form>
11</div>
12</div>
We’re using a simple form to collect and submit the despatch date. In a later post we’ll submit without refresh using AJAX.
The heading in <h4> uses the double underscore method $this->__(). Any string within the parentheses can then be translated. For example, assume the site locale is set as English (United Kingdom). All hard coding could be done using default US English to be consistent throughout the site. US words and phrases could then be translated for display within __() functions as in this example. To see how this works, add line 3 as <h4><?php echo $this->__(‘Estimated Dispatch Date (d/m/yy)’) ?></h4> with spelling ‘dispatch’ (US) rather than ‘despatch’ (UK). Copy the translation file app/locale/en_US/Mage_Adminhtml.csv to app/locale/en_UK/Mage_Adminhtml.csv. The file is made up of the text found within __() methods on the left, followed by the target translation spelling on the right. Within app/locale/en_UK/Mage_Adminhtml.csv at the end of the file add this line:
“Estimated Dispatch Date (d/m/yy)”,”Estimated Despatch Date (d/m/yy)”
Now the text entered in fields.phtml as ‘Estimated Dispatch Date (d/m/yy)’ will display as ‘Estimated Despatch Date (d/m/yy)’.
With that aside on translation behind us, let’s understand the rest of this form. The form method POST uses the action “<?php echo $this->getUrl(‘despatchdate/form/post’)?>” as the destination url for processing. The getUrl method allows us to specify this url using the string ‘module/controller/action’, so we don’t need to know the url before hand. Our module is ‘despatchdate’. The controller is ‘form’ and the action method is ‘post’. Magento will then use the components of the url generated to find the module, controller class and action method to process the form data, e.g. the url www.mysite.com/index.php/despatchdate/form/post/ will find the despatchdate module, the Blessthemoon_DespatchDate_FormController class and the postAction method.
OK we’re nearly there, an aspect of the form that requires some explanation is value=”<?php echo $this->getFormKey(); ?>” on line 7 which is posted as hidden, i.e. won’t show on page. Without this line assuming our controller has been built (we’ll build it in a future post), our POST action goes nowhere. Well thats not strictly true as we’ll keep getting taken to Admin’s dashboard, which might as well be nowhere.
We need to send this form key so Magento knows that we are not hacking into the site without permission. Without the key being sent, we never get to the target url.
Note that we’ve specified our text input type as text which should give us unlimited control with some string handling on how the value is entered, stored and displayed.
Clearly, there’s lots to be added to the form but we’ll tackle that in the next and subsequent posts.
Adding the block class
For now all we want to do is create our block class in app/code/local/Blessthemoon/Despatchdate/Block/Fields.php. This is the class we referred to in despatchdate.xml as ‘despatchdate/fields’ so now we need to create it. All blocks extend the base class Mage_Core_Block_Template, which, in turn, extends Mage_Core_Block_Abstract. Typically for Admin, in Fields.php we’ll extend Mage_Adminhtml_Block_Template which itself extends Mage_Core_Block_Template as seen in the following:
1<?php
2class Blessthemoon_Despatchdate_Block_Fields extends Mage_Adminhtml_Block_Template
3{
4
5}
Not much to it. We’ll add a method later. For now we have our class so that block ‘despatchdate’ has something to chew on.
We’re there
If we’ve followed all of the above, we’ll have a rather dull looking field on the View Order page.
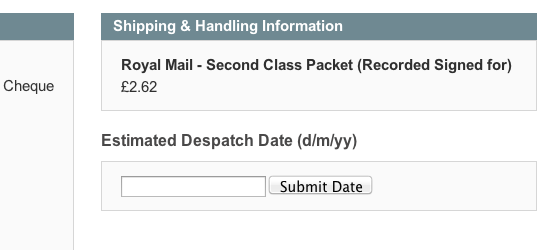
Entering data into the field won’t start any processing yet – we still need to create our controller class. We’ll do that soon. However, in the next post I want to enhance our form. We’ll add some Javascript and format the field to look nice and match the rest of the page.